


Pinspiration: Food is Art
7.11.2016
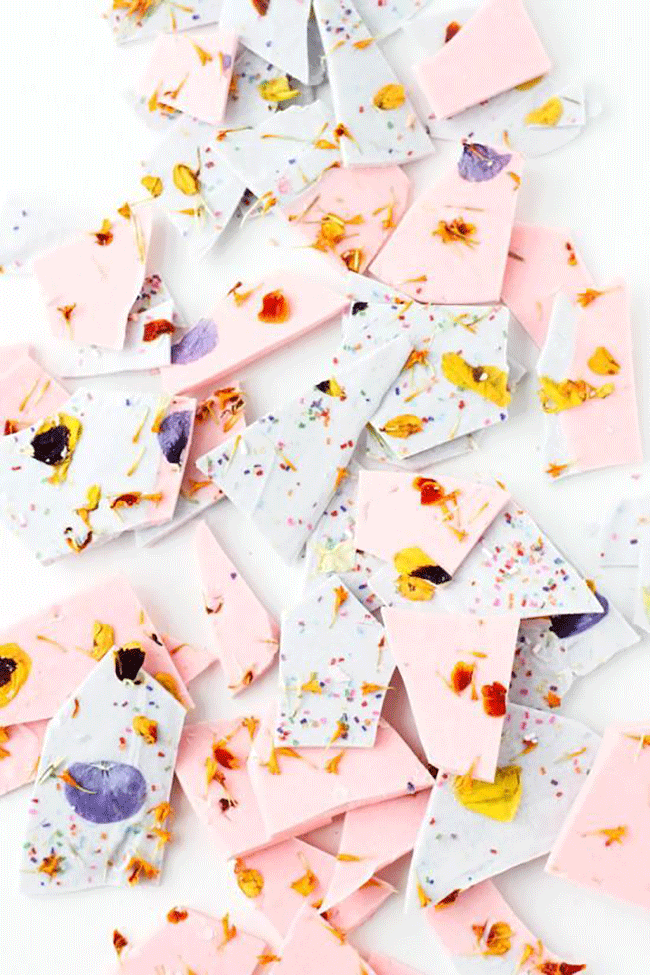
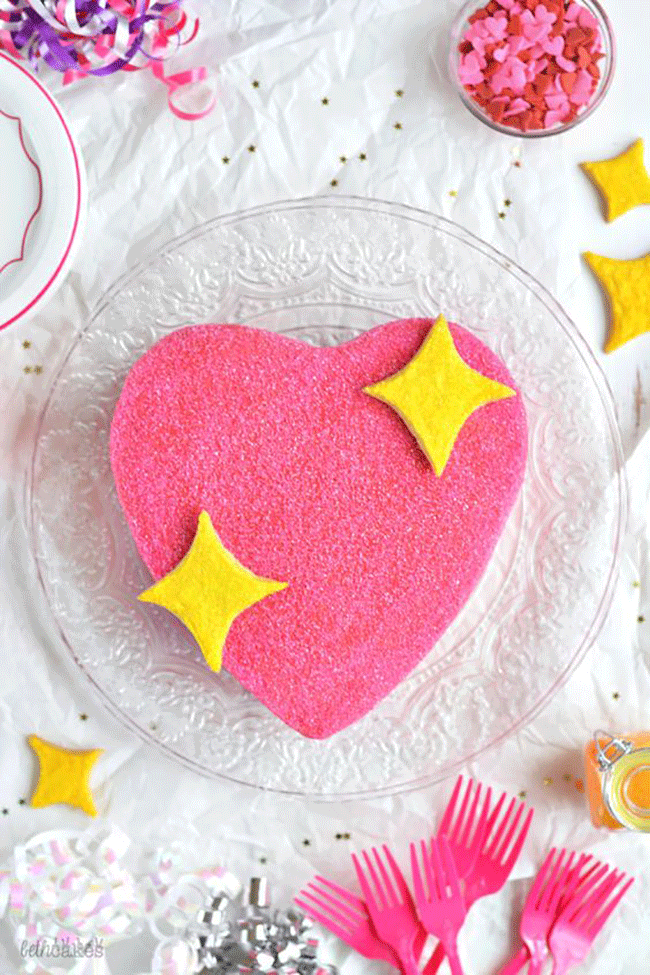
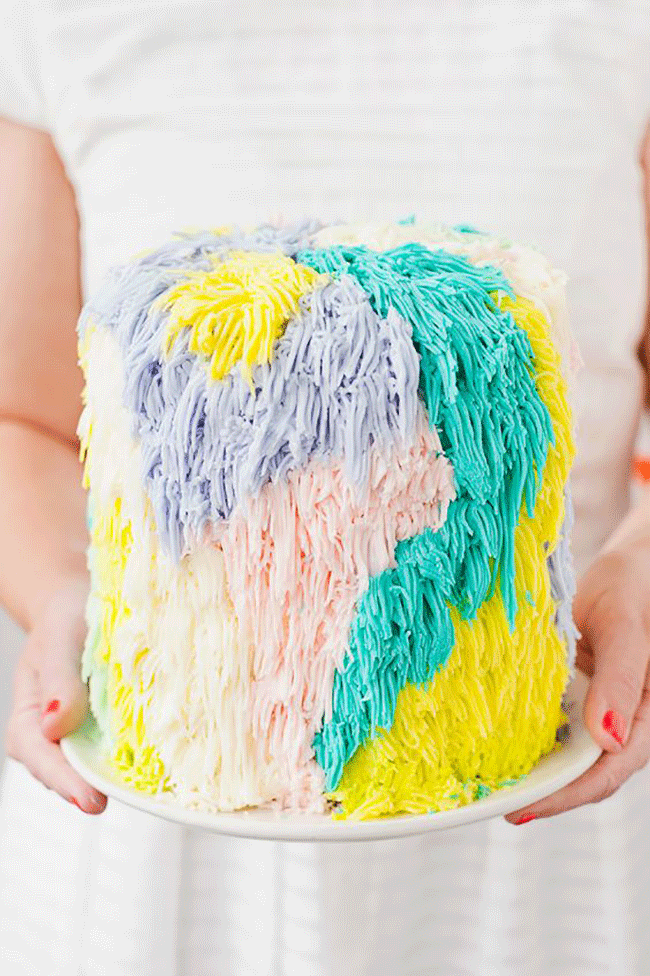
A little Food Pinspiration to brighten your Monday! One of my favorite mediums besides watercolor, food! Here are just a few on my dream wish list to make someday. I have pinned a whole heck lot more right here.


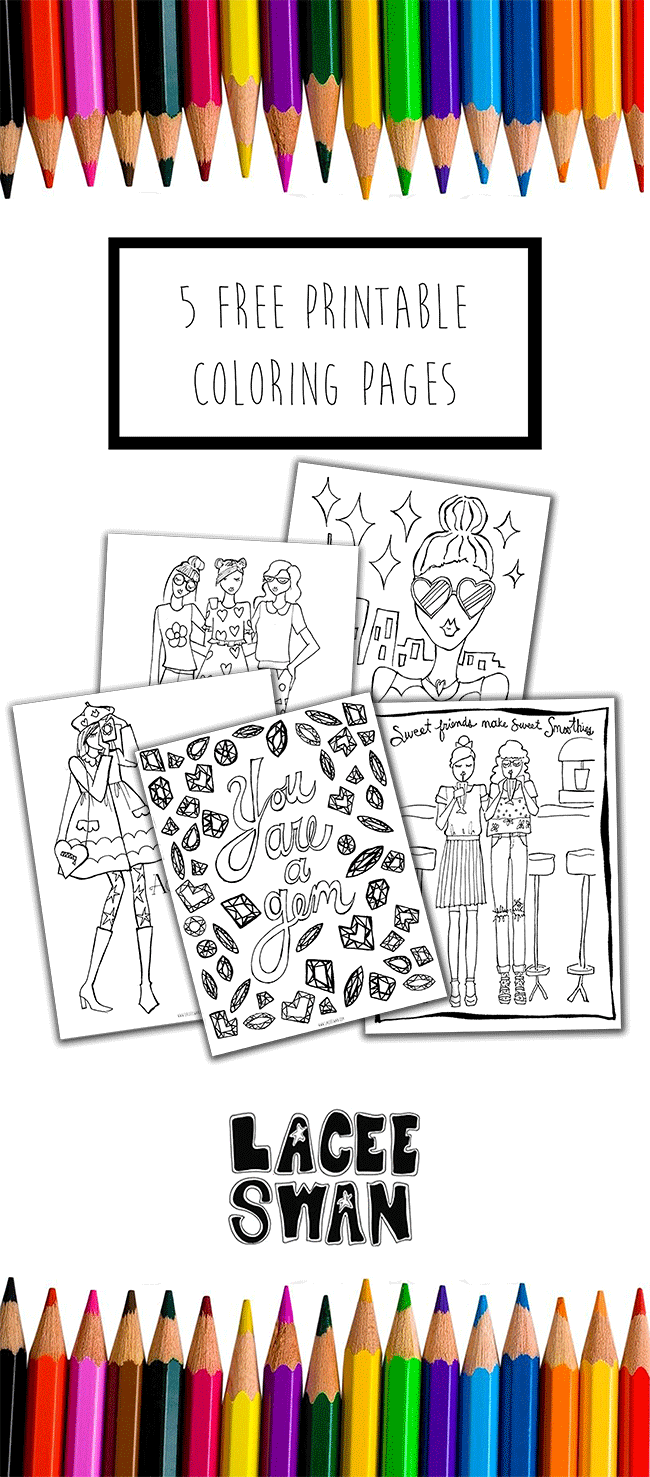
5 Free Printable Coloring Pages for Girls!
5.4.2016
My Best Friend’s daughter, age 8 keeps asking me to print her out some of my drawings for her to color. So I thought since she loves them so much, would bring them to you!

Events: Painting for Splendid/Ella Moss
4.21.2014
A couple of weeks ago I had a wonderful time hand painting personalized make-up pouches for Splendid + Ella Moss press preview. Here is a little sneak peak of the artsy madness!


Outfit: Modern Leopard Print
1.31.2014
I am adoring this modern leopard print dress from Parker that I recently ordered on Shopbop. A little ponte dress is essential for this cold weather, and this dress has a lazer cut hem. A classic with the perfect contemporary touches!
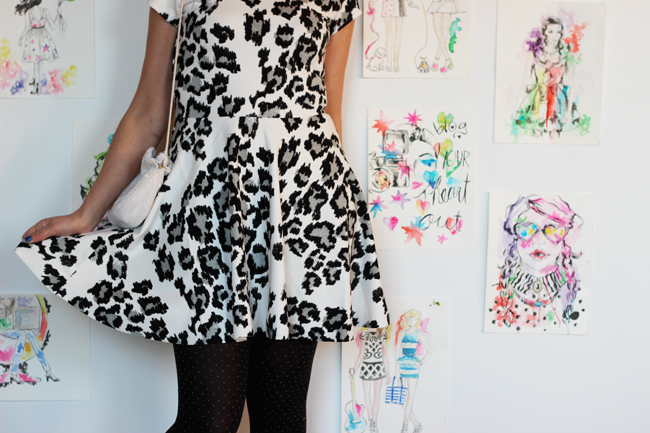
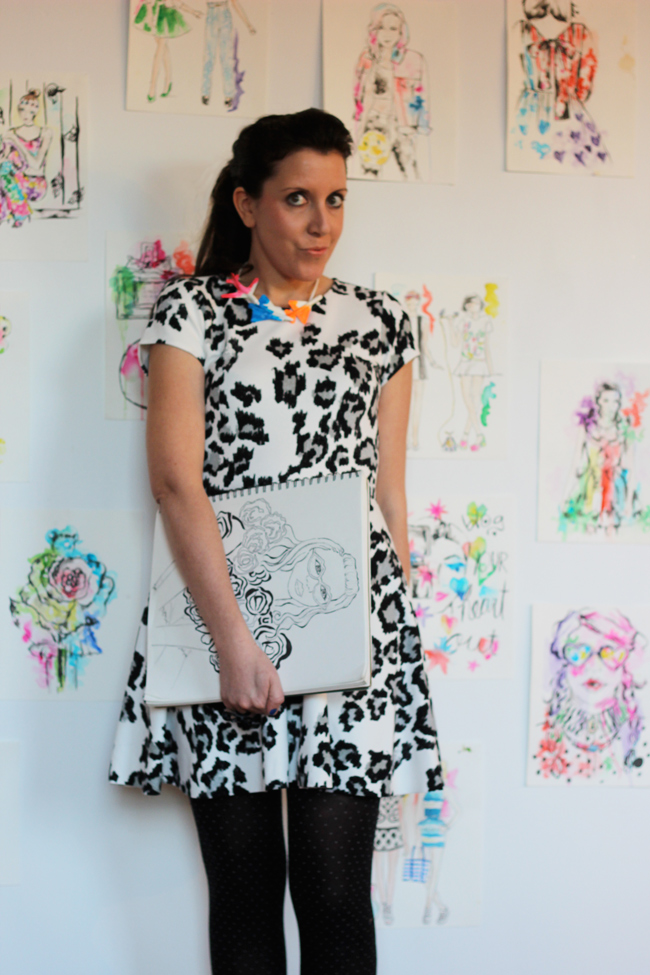
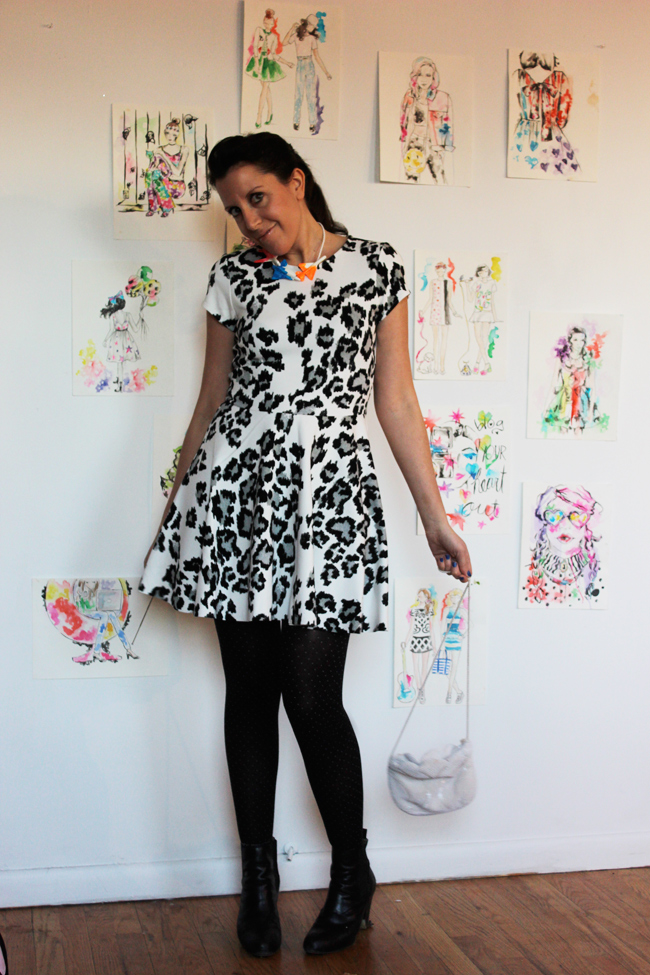
Outfit Top to bottom: { Parker Dress, vintage purse, diy necklace, Clark Shoes }
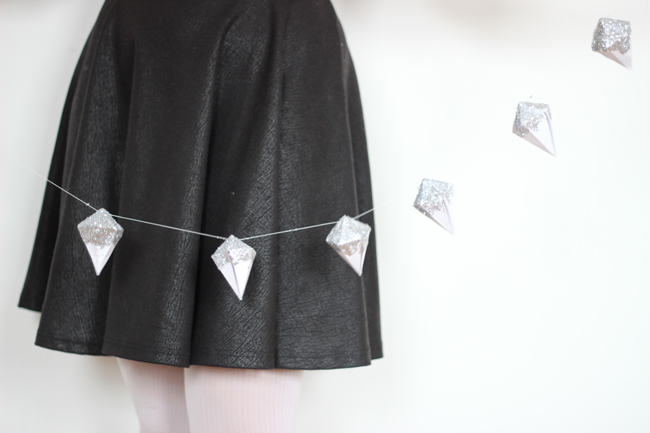
DIY: GLITTER DIPPED PAPER GEM GARLAND
12.15.2013

Glitter dipped paper gems, perfect for the Holiday season but cool enough to keep around all year!
supply list:
~Cardstock ( I used white, but any color of your preference)
~Scissors
~Glitter
~Glue (Elmers works fine or Modge Podge)
~paint brush for the glue
~Needle and strong beading thread or string of your choice
~Paper or paperplates, to keep the glitter mess not all over the place
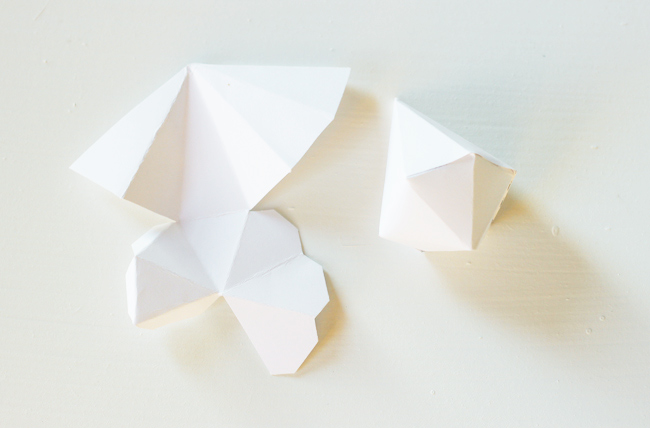
1. Print the gem diamond shape template here on white card stock, as many as you have the time to do. Even if you only do a few, will add a great little festive touch!
2. Cut them out and then begin to glue the tabs, one by one allowing them to dry.
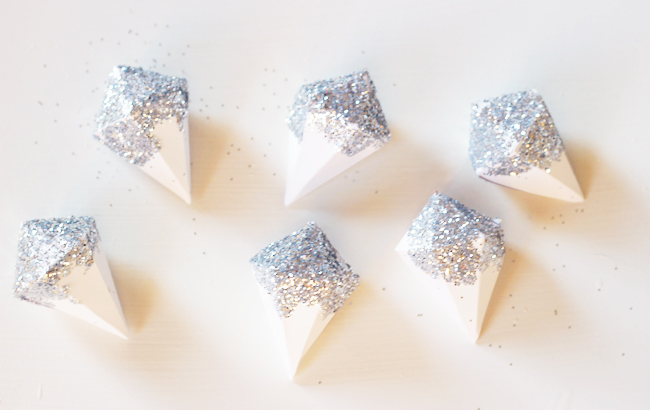
3. Once they are fully dried, dip the paint brush into glue and paint one by one the tops of the paper gems. I used uneven brush stokes to give it that artsy touch.
4. Over a paper plate pour the glue immediately before it has a chance to dry.
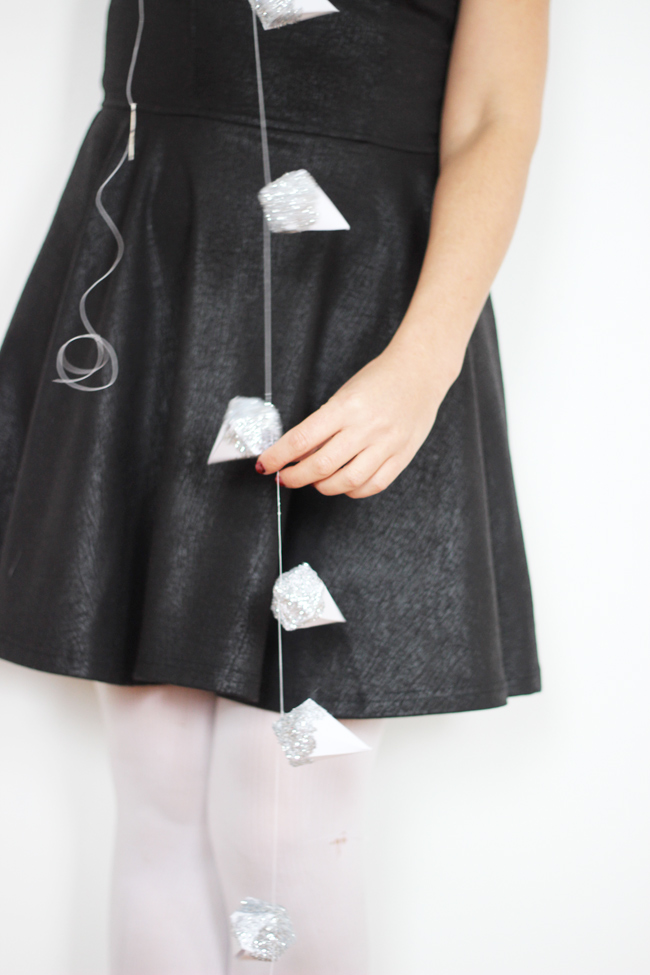
5. Once they are all dry glue them to string as far as part as you like. On this one I used a clear strong beading thread. I threaded through at the very tops and added a touch of glue to seal it in place.
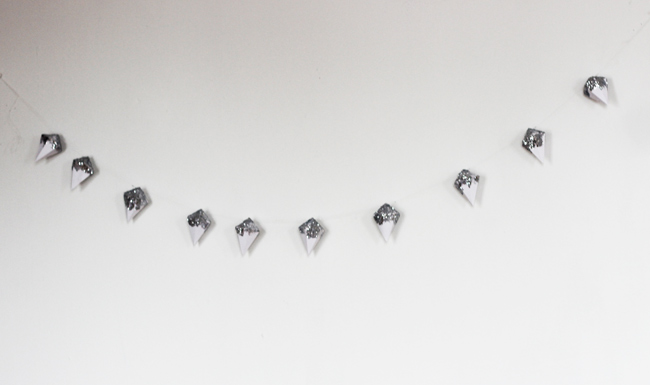
6. And then ta-da! Hang above the mantle, over a large frame, on the wall or around the tree!


Search


Comments
0